


















Knowledge Center: Your Go-To Resource for ADUs and Tiny Living
Knowledge Center: Your Go-To Resource for ADUs and Tiny Living
Email [email protected]
Phone 860-TINY-HOM (es)
What Are the Steps to Building an ADU in Connecticut? From Feasibility to Completion
Building an accessory dwelling unit can create more living space without requiring you to buy another property. But before construction begins, there are several important steps to complete.
If you are researching the steps to building an ADU, you may be wondering where to start. Should you choose a floor plan first? Check your property? Get a survey? Apply for permits? How do utilities and septic work? How long does the entire process take?
These are important questions because an ADU project involves much more than building the structure.
For homeowners in Connecticut, the process should begin by determining what is actually possible on the property. Lot conditions, local requirements, utilities, septic systems, surveys, site access, and the type of ADU you want can all affect the project.
A clear process helps uncover these issues early.
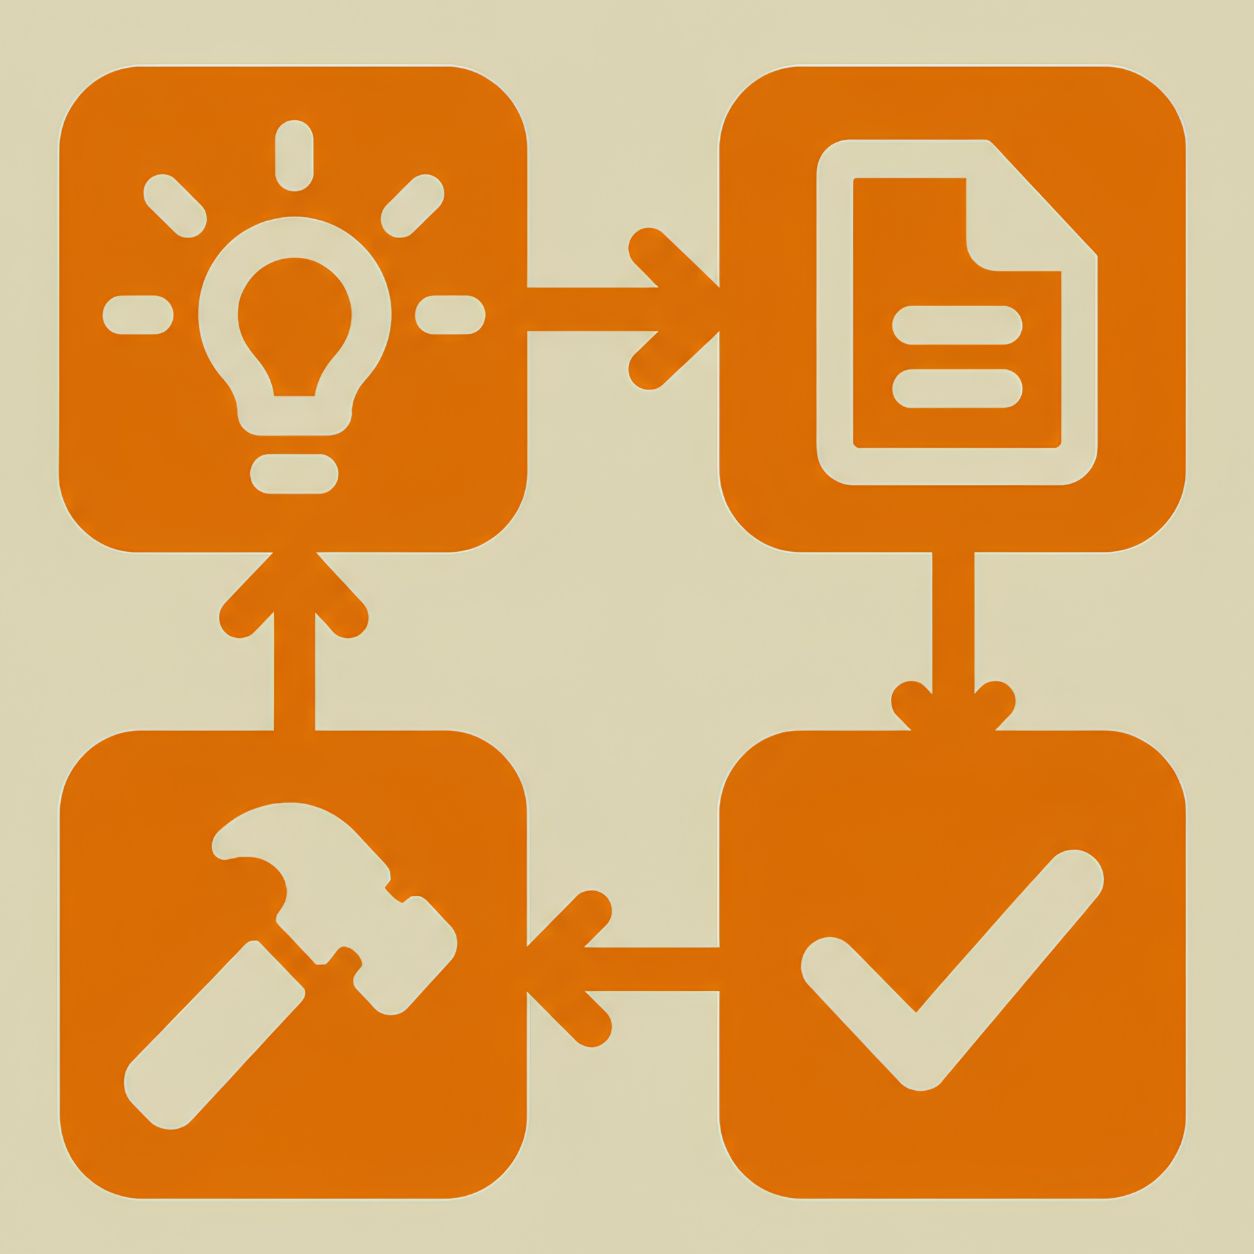
At Contemporary Tiny Homes, the ADU building process moves through four main phases: feasibility and design, permit application, construction, and final walkthrough and delivery.
Here is what to expect at each step.
See Our ADU Models
What Are the Steps to Building an ADU in Connecticut?
The basic steps to building an ADU are:
Evaluate the property for ADU feasibility.
Select and finalize the ADU design.
Coordinate the site survey and required engineering.
Prepare plans and construction documents.
Submit the permit application.
Complete site preparation and excavation.
Build the foundation and ADU structure.
Install plumbing, electrical, HVAC, and utilities.
Complete interior and exterior finishes.
Complete the final walkthrough and delivery.
These individual steps fit into four larger phases at Contemporary Tiny Homes:
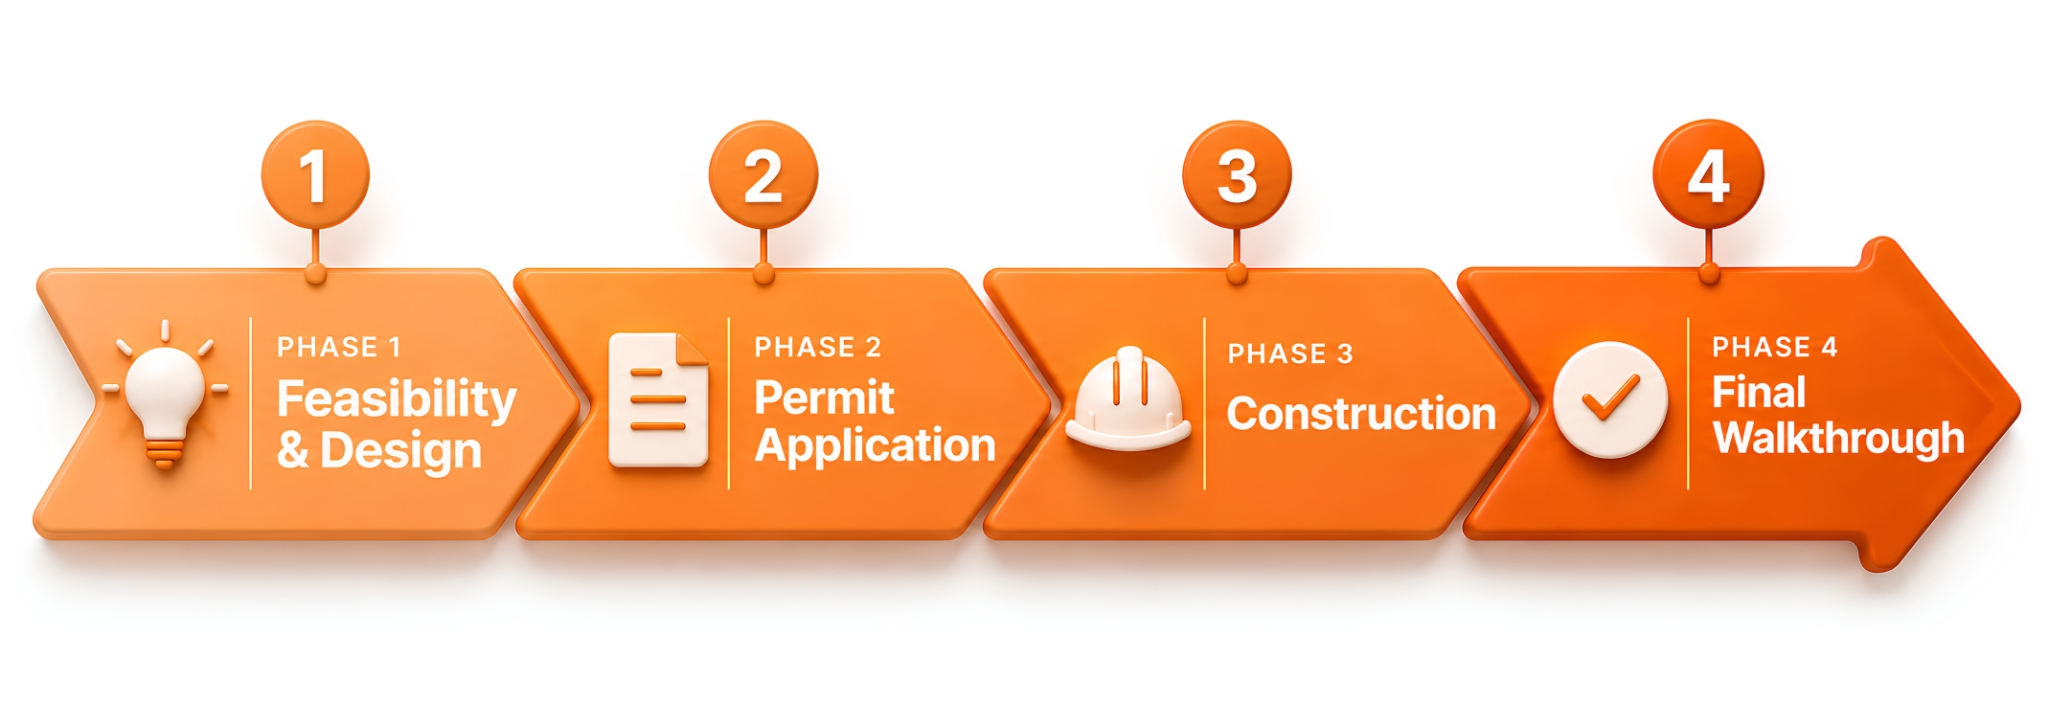
The order matters.
One of the biggest mistakes homeowners can make is starting with a floor plan before understanding the property.
A design may look perfect online. That does not automatically mean it will work on your lot.
The property may have conditions that affect the size, placement, design, utility connections, or overall project scope.
This is why the first stage should answer a simple question:
What can realistically be built on this property?
Once that question has been addressed, the project can move into design and the remaining stages with much greater clarity.
What Happens During Each Step of the ADU Building Process?
Understanding the full ADU construction process can help you prepare for decisions before they need to be made.
It can also help you understand why planning and feasibility are just as important as physical construction.
Step 1: Start With Property Feasibility
Before finalizing an ADU design, start by reviewing the property.
Every property is different.
Lot configuration, the location of the existing home, site access, utilities, septic systems, wells, and other site conditions can influence the project.
A detached backyard ADU may have different site considerations than an attached ADU.
Property feasibility helps identify these conditions before too much time is spent designing a structure that may need to change.
This stage is also the right time to gather information about the property.
If you already have a survey, septic information, or other relevant documents, having them available can make early conversations more productive.
The goal is not simply to determine whether you want an ADU.
The goal is to understand what kind of ADU makes sense for the property.
Step 2: Finalize the ADU Design
Once the project moves forward, the next step is developing and finalizing the design.
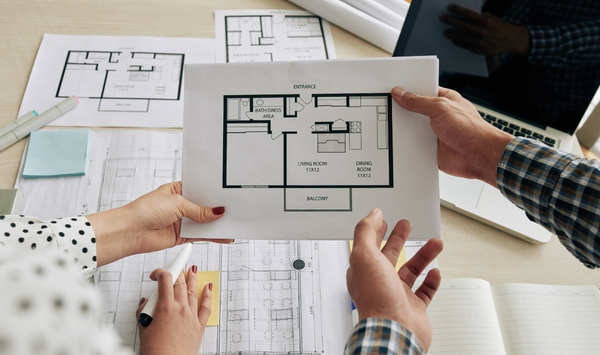
This includes the floor plan and overall layout.
It can also include decisions about flooring, cabinetry, fixtures, lighting, colors, and other interior and exterior selections.
Some homeowners already have a clear idea of what they want.
Others begin with a standard ADU model and make adjustments based on their property and needs.
The intended use should also influence the design.
An ADU for an older parent may prioritize one-level living and easy movement throughout the home.
A rental ADU may have different priorities.
A homeowner planning to live in the ADU later may want to think about future accessibility, storage, privacy, and long-term comfort.
The design should solve the reason you are building the ADU in the first place.
Step 3: Coordinate the Site Survey and Engineering
A site survey provides important information about the property.
Contemporary Tiny Homes coordinates a site survey as part of its process.
Properties with wells or septic systems may also require additional engineering to evaluate water and sewer capacity.
This is an important part of ADU planning because the structure does not exist independently from the rest of the property.
It needs a suitable location.
It needs access.
It needs utilities.
Those questions should be investigated before construction begins.
Contemporary Tiny Homes currently estimates the Feasibility & Design phase at less than one month.
Step 4: Prepare the ADU Permit Application
Once the design and required property information are ready, the project moves into the ADU permitting process.
Contemporary Tiny Homes prepares the required documentation and submits it to the appropriate local authorities.
The permit package can include site survey data, final plans and specifications, required engineering reports, and construction documents.
Permit review is an important part of the overall ADU timeline.
It is also one reason homeowners should avoid thinking about the construction period as the entire project.
Before the foundation can be built, planning and approvals need to happen.
Permit timing can vary by municipality.
Contemporary Tiny Homes currently estimates the Permit Application phase at typically one to two months.
That estimate should be treated as part of the overall project timeline rather than a guarantee that every town will complete its review on the same schedule.
Want to know whether your property is a fit for an ADU? Schedule a consultation with Contemporary Tiny Homes to review property feasibility, design options, potential site considerations, and the next steps for your project.
Step 5: Prepare the Site for Construction
Once the necessary approvals are in place, physical work on the property can begin.
Site preparation can include excavation and preparing the location for the new foundation.
This is where property conditions become especially important.
A relatively straightforward building site may require a different amount of work than a property with challenging access or other site constraints.
This is another reason feasibility should happen before construction.
Site preparation is part of the actual project.
It should not be treated as an afterthought.
Step 6: Build the Foundation and Structure
After site preparation, construction moves into the foundation and structural phases.
The foundation is completed first.
Framing follows.
Then the ADU begins to take shape with roofing, siding, windows, and doors.
This is the stage many homeowners picture when they think about building an ADU.
However, it is only one part of the complete process.
The planning, survey, design, engineering, and permit stages have already created the groundwork required to reach this point.
Step 7: Complete Plumbing, Electrical, HVAC, and Utilities
An ADU is a functional living space.
That means it requires the major systems you would expect in a home.
Construction includes plumbing, electrical work, HVAC, insulation, and other building systems.
Permanent utility connections are also part of Contemporary Tiny Homes' process.
Utility planning is especially important for detached ADUs.
The location of existing services and the distance between those services and the new structure can influence the work required.
Properties with septic systems can require additional attention.
These questions should be raised early so homeowners understand how their property may affect the project.
Step 8: Complete the Interior and Exterior
Once the major systems and structural work are complete, the project moves toward finishes.
This can include drywall, flooring, cabinetry, countertops, fixtures, and other interior details.
Exterior finishes are also completed.
Optional appliances may be installed depending on the project.
This is when the decisions made during the design phase become visible in the finished ADU.
Planning those selections earlier helps keep the project moving once construction reaches this stage.
Step 9: Complete the Final Walkthrough
The final stage is the Final Walkthrough & Delivery.
Contemporary Tiny Homes walks through the completed ADU with the homeowner.
The purpose is to confirm that the project has been completed as agreed and identify any final adjustments that may need attention.
CTH currently estimates this phase at approximately one to two weeks.
Once the project has reached completion, the homeowner receives the keys to the new ADU.
Talk To An ADU Expert
How Long Does It Take to Build an ADU in Connecticut?
One of the most common questions homeowners ask is, how long does it take to build an ADU?
The answer depends on what you mean by "build."
Physical construction is only one stage.
Contemporary Tiny Homes currently estimates the construction phase at approximately three to four months.
But the complete process begins before construction.
The current CTH process estimates:
Feasibility & Design: Less than one month
Permit Application: Typically one to two months
Construction: Approximately three to four months
Final Walkthrough & Delivery: Approximately one to two weeks
Contemporary Tiny Homes estimates approximately six months from signing the contract to receiving the keys.
An individual project's timeline can vary.
What Can Affect the ADU Construction Timeline?
Several property-specific factors can influence the schedule.
Permit timing
Different municipalities may have different review timelines.
Site conditions
Excavation, access, and other property conditions can influence construction.
Survey requirements
Property information needs to be available before parts of the planning and permit process can move forward.
Septic or wells
Additional engineering may be required for properties that rely on private systems.
Design changes
Changes made later in the process may require additional planning or coordination.
Utilities
The location and requirements of utility connections can influence site work and construction.
When talking with an ADU builder, ask about the complete timeline.
Do not ask only how many months the structure takes to build.
Ask what happens before construction, during construction, and before you receive the keys.
What Mistakes Should You Avoid When Building an ADU?
A clear ADU building process can help prevent surprises. It also helps to know which questions should be answered early.
Choosing a Floor Plan Before Checking Feasibility
Finding a floor plan is exciting.
But choosing the design should not come before understanding the property.
The size and placement of an ADU may be affected by site conditions and local requirements.
Start with the property.
Then choose a design that works with it.
Waiting Too Long to Investigate Septic or Wells
If your property uses a septic system or well, mention it during the early planning stage.
Do not wait until construction is approaching.
Additional engineering may be required to evaluate water and sewer capacity.
Knowing that earlier can help create a clearer project plan.
Ignoring Utility Connections
Utilities are an important part of building a functional accessory dwelling unit.
Ask how water, sewer, electricity, and other required services will reach the ADU.
This is particularly important when planning a detached structure farther from the existing home.
Assuming Every Connecticut Town Has the Same Timeline
Do not assume a permit experience in one town will be identical to another.
Municipal review times can vary.
The same is true for property conditions.
Your timeline should be based on your project rather than another homeowner's experience.
Focusing Only on the Construction Phase
A three-to-four-month construction estimate does not mean the entire ADU project takes three to four months.
Feasibility comes first.
Design comes next.
Then surveys, engineering, permits, site preparation, construction, final walkthrough, and delivery need to happen.
Look at the complete process when planning your project.
Making Major Design Changes Too Late
Design is the time to make important decisions about layout, finishes, and how the space will function.
Late changes can create additional coordination.
Think carefully about how the ADU will be used before finalizing the design.
Will it house a parent?
Will it become a rental?
Could you live there later?
Will accessibility matter?
Your answers can affect the layout you choose today.
Not Asking What Happens Next
At every phase, you should understand the next step.
Ask what happens during the initial consultation.
Ask what information is needed to evaluate the property.
Ask when the site survey occurs.
Ask how design decisions are made.
Ask what happens during permitting.
Ask what is included during construction.
A good process should make the next step clear.
Start Your Connecticut ADU Project With the Right First Step
The steps to building an ADU in Connecticut are easier to understand when you view the project as one connected process.
It starts with the property.
First, determine what is feasible. Then finalize the ADU design and gather the property information needed to move forward.
Next comes permitting.
Once the required approvals are in place, the project moves into site preparation and construction. The foundation, structure, utilities, building systems, and finishes are completed before the project reaches its final walkthrough and delivery.
Contemporary Tiny Homes organizes this journey into four clear phases:
Feasibility & Design → Permit Application → Construction → Final Walkthrough & Delivery
The most important first step is not choosing cabinets, fixtures, or paint colors.
It is understanding what can realistically be built on your property.
That gives you a stronger foundation for every decision that follows.
Ready to understand what the ADU building process could look like for your property? Book a consultation with Contemporary Tiny Homes to review your property, ADU feasibility, design options, potential site considerations, and the next steps toward building your ADU.


Copyright 2026. All rights reserved. Norwalk, CT
Connecticut's New Home Construction Contractor License: #NHC.0017654
EPA Lead-Safe Certified NAT-F269966-1